
Perhaps you’ve run across Twitter bots like @thesefutures or @thinkpiecebot and wondered how to do that yourself. It’s surprisingly simple and you should give it a try! For the less-technically-inclined, one can even create a bot with minimal code using a tool that will handle the heavy lifting for you. But if, Reader dearest, you desire something more than that— you’ve come to the right place. Today we’re going to get our hands dirty with Python and the Twitter API, and code our own Twitter bot from scratch. Later, we’ll even go over deploying the bot to Heroku and letting it loose to act autonomously in the cloud. If this piques your curiosity, then I’d love to show you how simple it can really be, with a pinch of Python magic.
Introductory matters
Before we dive in, let’s go over the tools we’ll be using. Of course, you’ll need Python 3, git, and your favorite Python IDE (I’m partial to PyCharm). To interface with Twitter, we’ll be working with the excellent Twitter API wrapper Tweepy. To generate our tweets, we’ll also work with Markovify, a Markov chain library. Today, we’ll get you set up with Tweepy & Markovify, write the TweetBot class, and get your new bot up & running. Roll up your sleeves, we’ve got some code to write!
Setup: Getting your Twitter credentials & setting up your libraries
To start, you’ll need to get some Twitter credentials so that you can access the API. Unless you want your bot to post to your personal Twitter, I recommend creating a new Twitter account for your bot and going through this process with the dedicated account. First, you’ll need to register a new twitter app for your bot. I should mention here that you’ll need to associate a unique phone number with the account in order to create an app. If you don’t have a spare phone number laying around, you can either make use of a service like Google Voice or Burner, or register the app on your primary Twitter account and go through the lengthy process of transferring the API key to another account, as outlined on Molly White’s blog. Now would also be a good time to go over the automation rules and best practices. In any case, once you’ve got an account registered, let’s proceed:
Getting your credentials
Go to apps.twitter.com and click on the “Create New App” button. You’ll need to fill out a few fields for your bot’s name, description, and website, and to agree to the Twitter Developer Agreement, and then you’ll have a new app! Now, go to the Permissions tab and ensure that your app has read and write permissions. Finally, go to the Keys and Access Tokens tab, and create your access tokens. We’ll need to store these for your bot.
It’s important that you keep these keys private, because anyone with access to them can access the API in your name and freely post to your account. To prevent this from happening, we’re going to ensure that your keys do not get checked in to version control. Make a directory for your project, git init as you usually would, then create a file entitled .gitignore with these contents:
twitter_credentials.py
Now, let’s create twitter_credentials.py and store your access keys in it:
consumer_key = ""
consumer_secret = ""
access_token = ""
access_token_secret = ""
Copy and paste the keys and access tokens from Twitter into the appropriate variables in twitter_credentials.py, and you’ll be ready to move on.
Installing Tweepy & Markovify
This should be the easiest part of the whole process!
pip install tweepy
pip install markovify
That’s it! Now we’re ready to code.
Tweeting with Tweepy
OK, let’s dive into the code. Make yourself a tweetbot.py, and import Tweepy and your Twitter keys:
import tweepy
from twitter_credentials import consumer_key, consumer_secret, access_token, access_token_secret
Now we need to get authorized with Twitter. Tweepy makes this super simple:
auth = tweepy.OAuthHandler(consumer_key, consumer_secret)
auth.set_access_token(access_token, access_token_secret)
api = tweepy.API(auth)
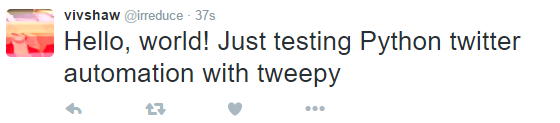
Let’s test it out!
api.update_status("Hello, world! Just testing Python twitter automation with tweepy")
Head over to your bot’s twitter, and you should see a tweet!
If this worked out for you, you’re all set to move on to our next challenge: procedural text generation.
Generating gibberish with Markovify
Now that our bot can post to Twitter, we need to teach it to speak. We’re going to do this with Markov chains. To horribly oversimplify, what a Markov chain does is this: when given an input state, figure out the most likely state to follow it. We’re going to train a Markov model on a corpus of natural-language text, allowing us to procedurally generate semi-coherent gibberish in the language of your choice. (If you’re algorithmically-minded, this is actually really easy to implement by hand, but we’re going to stick with a tried-and-true library for this bot.)
Getting a corpus
Before generating Markov chains, we’ll need a corpus. This doesn’t need to be anything special; a flat text file is all you’ll need. The larger the corpus, the better that your results will be— something novel-length would be ideal. If you’re having trouble finding a corpus, you could grab some public domain literature from Project Gutenberg, or use my favorite corpus, the entire text of Charlotte Brontë’s Jane Eyre. Whatever corpus you choose, just download it and save it as corpus.txt in your project directory.
It’s Markov time!
In your tweetbot.py you’ll need to import Markovify:
import markovify
Now we’ll load up the corpus and build a model with it.
with open("corpus.txt") as corpus_file:
	corpus = corpus_file.read()

model = markovify.Text(corpus)
Time to take our new Markov model for a spin! The make_sentence() method will generate a sentence from your model:
In[1]: model.make_sentence()
Out[1]: 'I remembered the answer of the house, and once attempted chastisement; but as mere strangers, they had to deceive a fine old hall, rather neglected of late occurrence.'
It worked! But if we want our bot to post on Twitter, we’ll need to find a way to keep the length of the generated sentences under 140 characters. Conveniently, Markovify provides the make_short_sentence() method to do exactly that. Let’s give it a try!
In[2]: model.make_short_sentence(140)
Out[2]: 'Refuse to be happy at his features, beautiful in their still severity; at his eyes, bright and dark conjectures.'
Feel free to play around with the parameters until you like your model’s results. Once you’re all set, we can move on to building our bot.
Sketch up a TweetBot class
Let’s pause a moment and figure out what we want our bot to do before we start writing it. If we want our bot to run autonomously, we’ll need it to do at least these things:
- Authenticate with Twitter
- Load a text corpus
- Make a Markov model from that corpus
- Make sentences from the model
- Tweet those sentences
- Automate itself to tweet every X seconds
Let’s try to break this down into some variables and methods. Clearly, we’ll need to give our bot a corpus to load and a delay in seconds between tweets. We’ll need to store a markov model in order to generate tweets. We’ve also seen from noodling with Tweepy that we’ll need an api object. Of these, the api and the model are the only ones we’ll need to use repeatedly, so they’ll be class fields; the other two need merely be method arguments. As for methods: we’ll only need to authenticate, load our corpus, and make our model once, so it makes sense to put these in the constructor. However, if we pull out the corpus and modeling into a helper method, we’ll also be able to change our corpus after the bot is initilized. Making sentences and tweeting them can go in the same method, since we’ll always be doing both together. Lastly, automating can be its own thing. If we mock up those class methods, it’ll look like this:
class TweetBot:
    def __init__(self, corpus):
    	#load corpus & build model
        #initialize Twitter authorization with Tweepy
        pass

    def load_corpus(self, corpus):
        #open our corpus & run it through Markovify
        pass

    def tweet(self):
        #generate Markov tweet & send it
        pass

    def automate(self, delay):
        #automatically tweet every delay seconds
        pass
Now that we know what our bot class will look like, let’s start filling in the code.
Putting it all together
init
If we want to initialize our Markov model in the constructor, we’ll need to pass it the path to our corpus. We can then call the load_corpus method we’ll later write. As for the authentication, it’ll work just the same as in our earlier Tweepy exploration, except that we’ll need to store it in a field.
    def __init__(self, corpus):
        self.load_corpus(corpus)

        #initialize Twitter authorization with Tweepy
        auth = tweepy.OAuthHandler(consumer_key, consumer_secret)
        auth.set_access_token(access_token, access_token_secret)
        self.api = tweepy.API(auth)
load_corpus
Just like in our Markovify example, this method will take the path to our corpus file, load its contents into a variable, and train a Markov model with it. We’ll then store the model as a field.
    def load_corpus(self, corpus):
        with open(corpus) as corpus_file:
            corpus_lines = corpus_file.read()
        self.model = markovify.Text(corpus_lines)
tweet
We’ve already seen how to generate a tweet from our model and how to update our status, so we can just put them together. However, we don’t want our bot to crash if a tweet fails for some reason (say, an improperly-formed tweet, or hitting a rate limit). So, let’s wrap it in a try-except block to catch any Tweepy errors that get thrown.
    def tweet(self):
        message = self.model.make_short_sentence(140)
        try:
            self.api.update_status(message)
        except tweepy.TweepError as error:
            print(error.reason)
automate
Now we just need to get our bot to post every delay seconds until we stop it. The easiest way to do this is Python’s sleep function. Let’s import it:
from time import sleep
Now the rest is trivial.
    def automate(self, delay):
        while True:
            self.tweet()
            sleep(delay)
Tying it all together
Now that we have all the pieces, let’s put them together, then write ourselves a main method to automatically tweet every hour.
import tweepy
import markovify
from time import sleep
from twitter_credentials import consumer_key, consumer_secret, access_token, access_token_secret


class TweetBot:
    def __init__(self, corpus):
        self.load_corpus(corpus)

        #initialize Twitter authorization with Tweepy
        auth = tweepy.OAuthHandler(consumer_key, consumer_secret)
        auth.set_access_token(access_token, access_token_secret)
        self.api = tweepy.API(auth)

    def load_corpus(self, corpus):
        with open(corpus) as corpus_file:
            corpus_lines = corpus_file.read()
        self.model = markovify.Text(corpus_lines)

    def tweet(self):
        message = self.model.make_short_sentence(140)
        try:
            self.api.update_status(message)
        except tweepy.TweepError as error:
            print(error.reason)

    def automate(self, delay):
        while True:
            self.tweet()
            sleep(delay)


def main():
	bot = TweetBot("corpus.txt")
	bot.automate(3600)

if __name__ == "__main__":
    main()
Now, we can run our bot from the command line:
python tweetbot.py
Check your bot’s Twitter feed, and you should see a new tweet. Congrats! You’ve learned how to write Twitter bots. Now that you have a working bot, why not tinker around with it a bit? When you’re satisfied, make sure to commit all your changes to git, as you’ll need git for next time.
Next time on Build You a TweetBot
In the next installment, we’ll go over polishing up your app’s interface with argparse, using environment variables with dotenv, and migrating our bot to the cloud with Heroku. If you want to see this code in action, you can check out my bot @MechaBronte. Lastly, if you want to see where we’ll eventually be going with this, all my code is up on GitHub.
Happy botsmithing!